To configure a Snom phone you first need to obtain the IP address of the phone, the easiest way of doing this is to reboot the phone and during the booting process the IP address will be displayed on the screen.
Once you have the IP address type it into the address bar of a web browser and press enter. This will bring you to the homepage of the phone’s web interface.

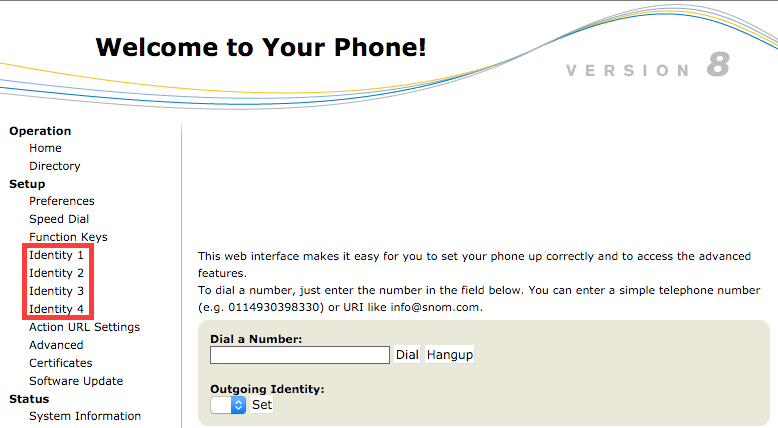
Once on the web interface you will have identities on the left-hand menu, select any identity and you will then be brought to the page where you enter the account information.
You will need the username, password, and the SIP proxy from the control panel, this can be obtained by clicking on the username of the extension within the
control panel.
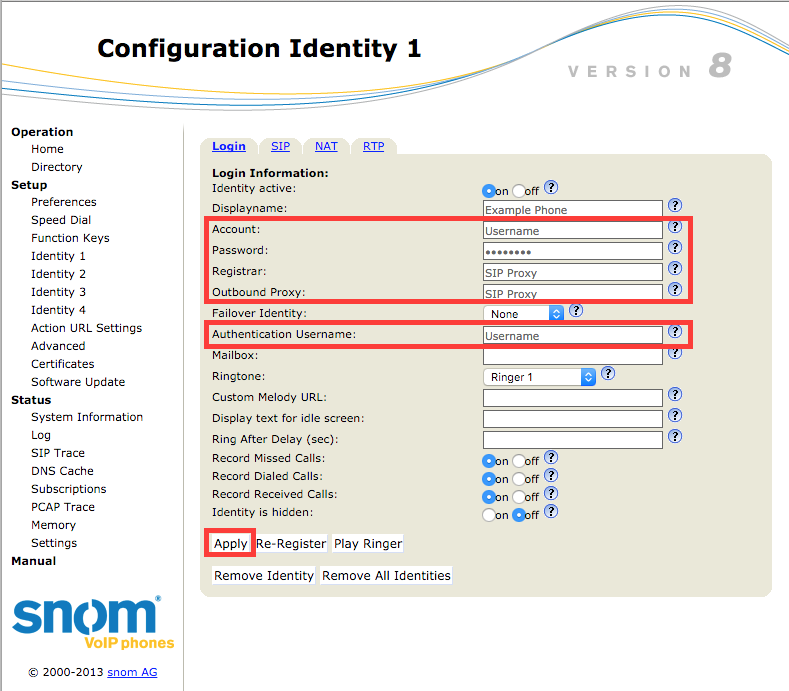
Fill in the boxes as demonstrated in the below image, changing the “Username", “SIP Proxy”, and the password field to the values found within your control panel.
Once you have done this click “Apply” at the bottom and then within a few moments your phone should appear as online within your control panel and be ready for use once configured correctly in the control panel.

In some networks, if you are unable to make calls from a Snom device, you may need to enable Compact Headers which can be found within the
Advanced Settings and
SIP/RTP tab.

This should be turned to
on and then the phone rebooted.