To setup your adapter, you will first need to
create an extension and have your
username, password, SIP proxy and STUN server addresses to hand.
The first step will be to login to your adapter via your browser. To obtain the IP address of the adapter, the following steps should be followed:
Plug-in adapter to network
Connect phone handset to device
Dial * * * *
Enter 110#
The device will then read back the IP which you should then enter into your browser connected to the same network and you will see a screen with a login prompt.

The default login details for the device should be both
admin for the username and password.
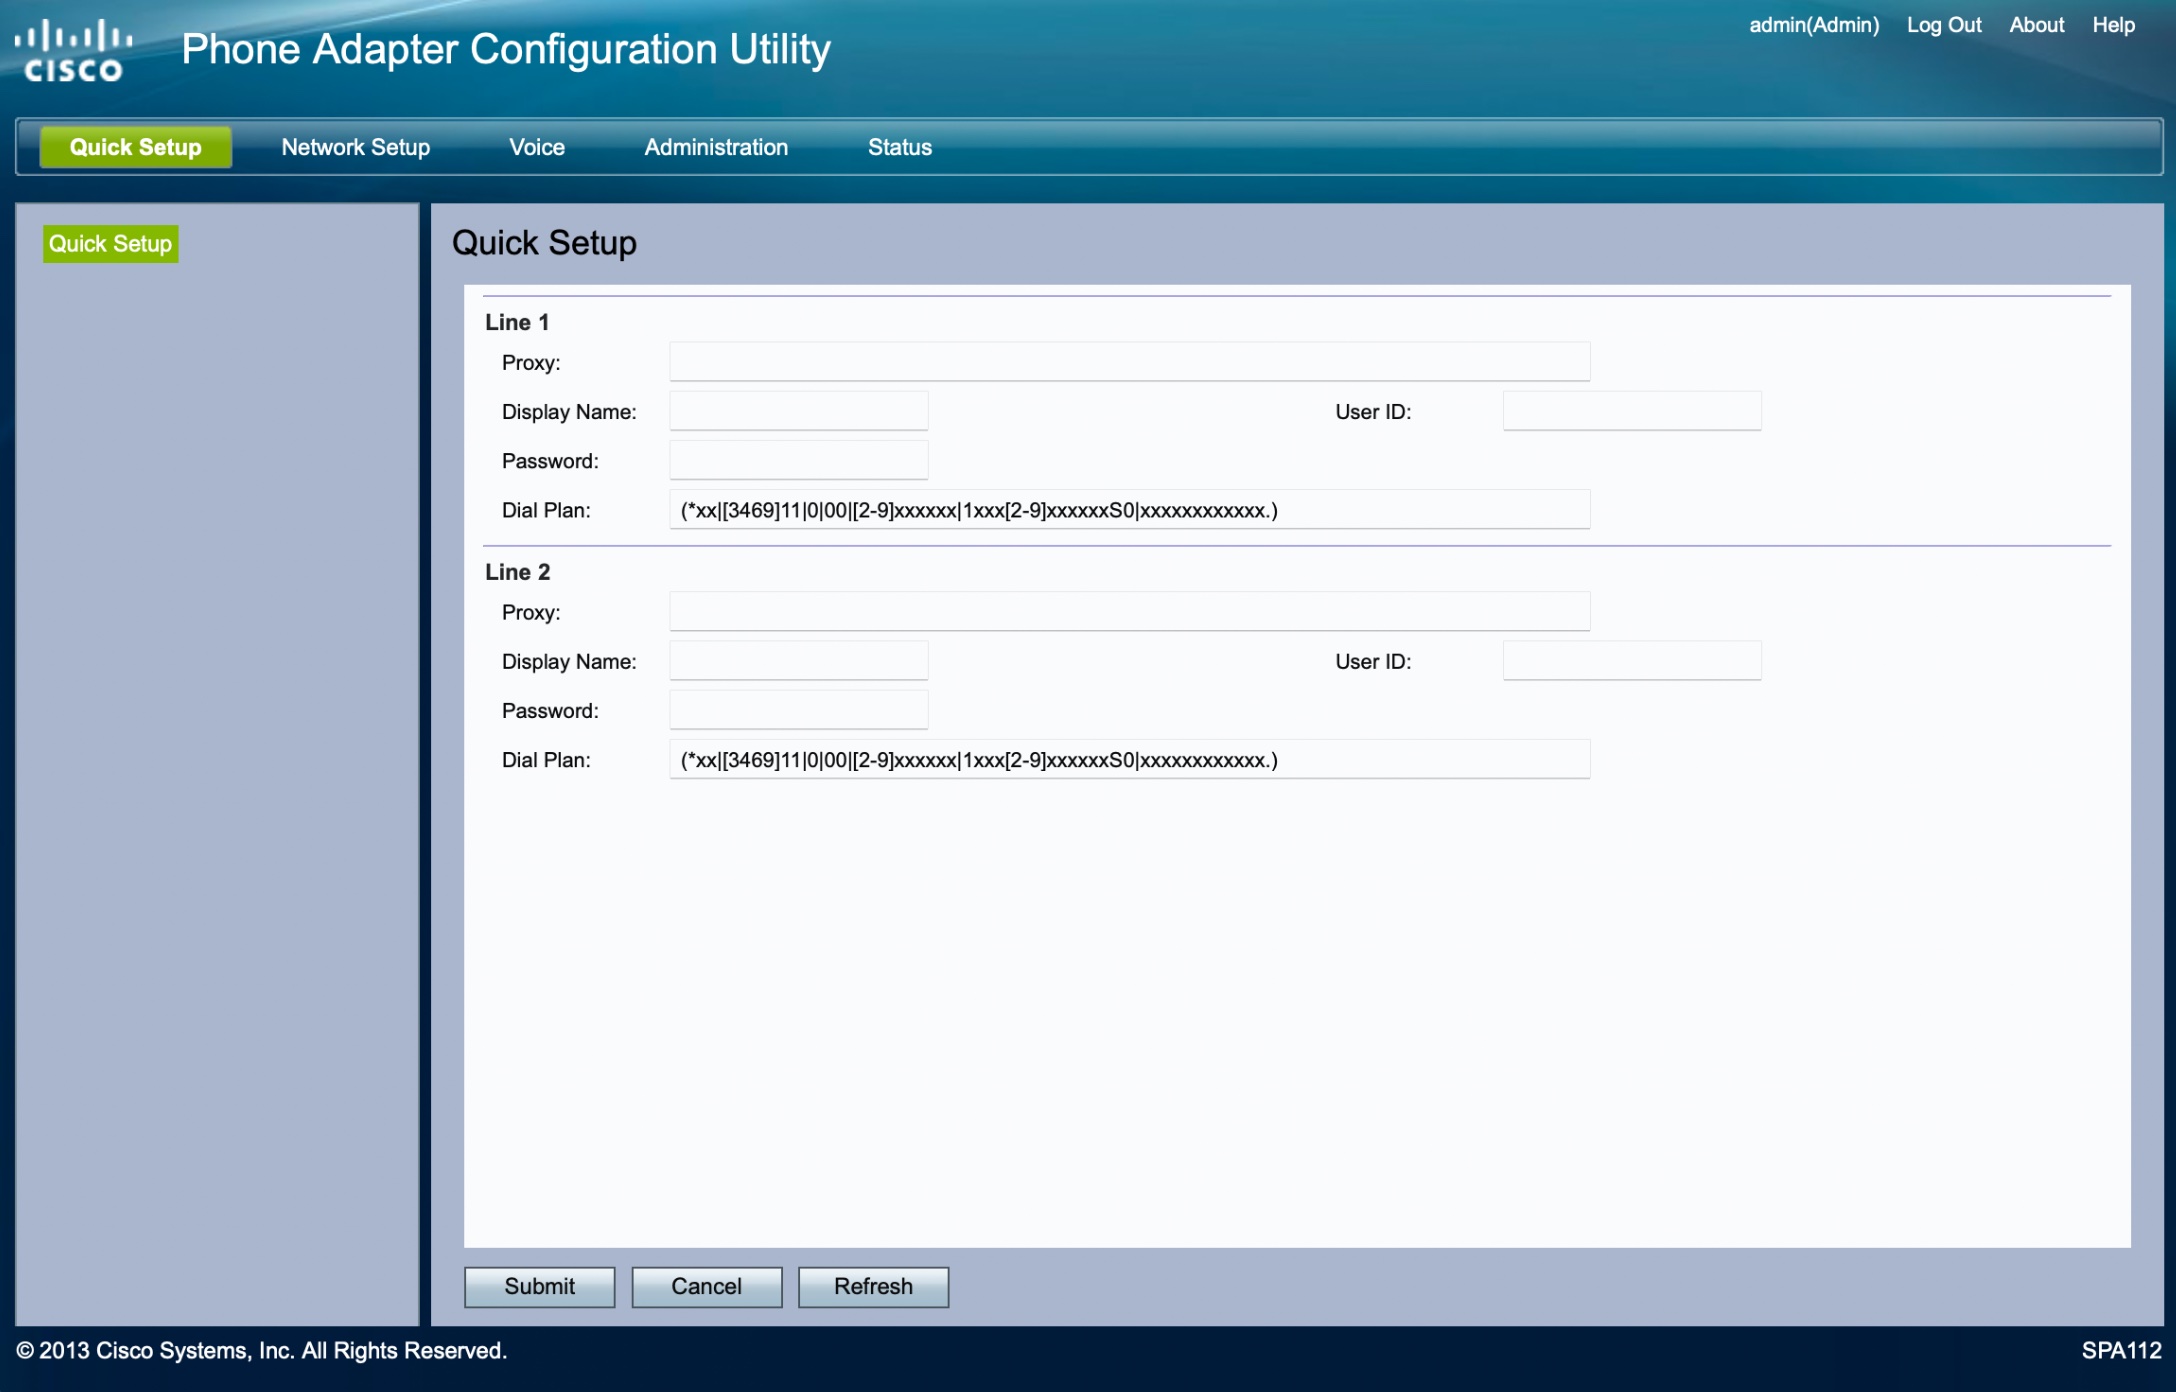
Once logged in, you'll be presented with a "Quick Setup Page"

On this page, you'll need to enter values from your extension information as mapped below.
Username > User ID (i.e p1234-myusername)
Password > Password (your extension password)
SIP Proxy > Proxy (i.e sip-xxx.voipsrv.net)

Display Name (The descriptive name for the extension, such as "Home" or "Office")
Additionally, we recommend changing the dial plan to one more suited to UK usage from the default which is US-centric.
(1[0-9][0-9]|999|116xxx|118xxx|1471|157[1-3]|00[1-9]x.|14100[1-9]x.|147000[1-9]x.|0[1-9]xxxxxxxxx|1410[1-9]xxxxxxxxx|14700[1-9]xxxxxxxxx|00xxx.|xx.|*##)
These changes should then be saved by clicking
Submit.
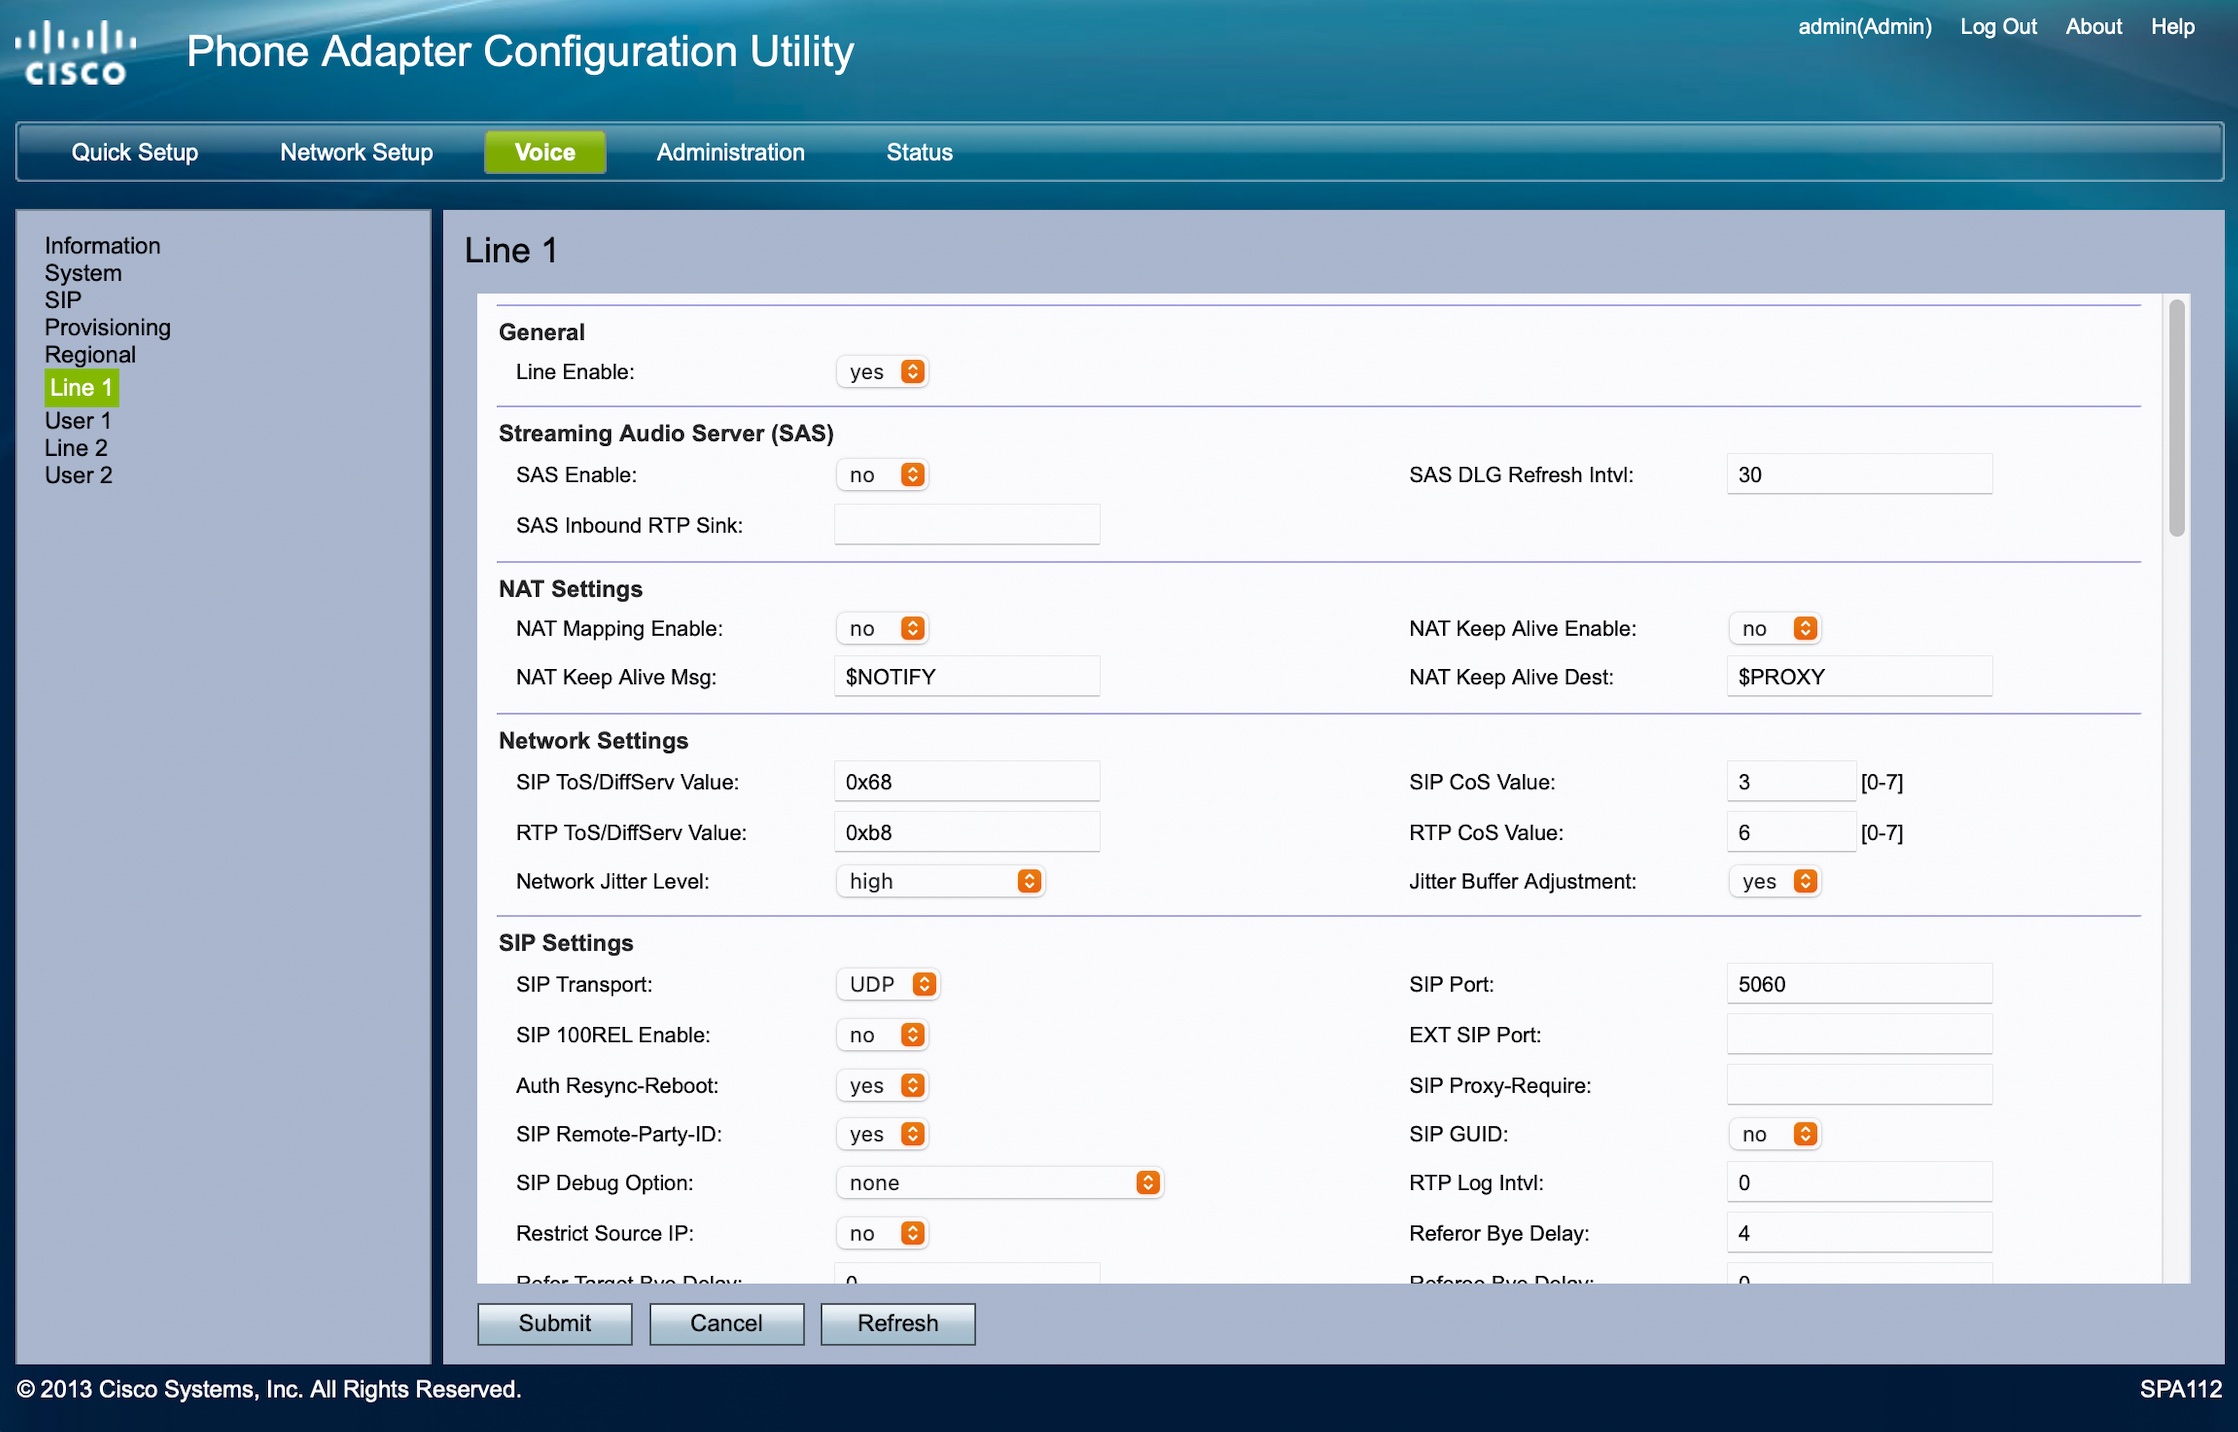
Moving on to the Voice menu and then "Line 1" on the left menu.

On this page the following settings should be changed:
NAT Mapping Enabled: Yes
NAT Keep Alive Enable: Yes
Moving down the page, look for the Miscellaneous section.

Caller ID Method: ETSI FSK with PR (UK)
Caller ID FSK Standard: v.23
Then save this page also by clicking
Submit.
The adapter may then reboot and incoming and outgoing calls should work as expected.